
Lesson 10
What Is Mac OS
Mac OS is the computer operating system for Apple Computer's Macintosh line of personal computers and workstations. A popular feature of its latest version, Mac OS X , is a desktop interface with some 3-D appearance characteristics. OS X has a modular design intended to make it easier to add new features to the operating system in the future. It runs UNIX applications as well as older Mac applications.
Mac OS comes with Apple Computer's iMac and Power Macintosh line of computers.





Mac OS is the computer operating system for Apple Computer's Macintosh line of personal computers and workstations. A popular feature of its latest version, Mac OS X , is a desktop interface with some 3-D appearance characteristics. OS X has a modular design intended to make it easier to add new features to the operating system in the future. It runs UNIX applications as well as older Mac applications.
Mac OS comes with Apple Computer's iMac and Power Macintosh line of computers.
How To Create a New User Account On The Mac
- Click on the Apple icon in the upper left corner of your Mac's screen.
- Select System Preferences from the drop down menu.
- Click on Users & Groups.
- Click the lock in the lower left corner to make changes.

- Type your administrator password.
- Click Unlock.
- Click the Add user account button (it looks like a plus, underneath the list of user accounts). .

- Set the new user's account type.
- See the notes above to understand the difference between administrator, standard, managed with parental controls, sharing only and group. You can enable administrator access and even enable parental controls after an account has been created, so if you're not sure what to set, don't panic. .

- Enter a full name for the user.
- Enter an account name.
- This account can be linked to an iCloud account, which will enable the user to log in using their own Apple ID. This can make cloud sharing, syncing with iOS devices and other Macs easier.
- You can set up a separate password, which you'll be required to input and verify. You can also enter a hint in case the user (or you) forget the password.
- When you're finished, click the Create User button.
How To Delete A User Account
- Click on the Apple icon in the upper left corner of your Mac's screen.
- Select System Preferences from the drop down menu.
- Click on Users & Groups.
- Click the lock in the lower left corner to make changes.

- Type your administrator password.
- Click Unlock.
- Click the Remove user account button (it looks like a minus, underneath the list of user accounts).
How To Create A Folder On A Mac Computer
Navigate to the desktop of your Mac. The word "Finder" will be displayed at the top left corner of the monitor beside the apple icon once you're there — if it says anything else, like "Safari" or "Word," you are technically still in that program, so just click on an empty space on your desktop.
Click the word "File" beside "Finder."
Click "New Folder" from the dropdown menu.

And that's it, new folder created.
Approach #2
Navigate to the desktop of your Mac.
Right click on your mouse, or use two fingers held close together to create a right click on your trackpad.
Click "New Folder" in the menu that appears.

How To Edit And Add Files To A Folder On A Mac
Once your new folder is created, it will be called "untitled folder." To change its name, you can either do a slow double click on its name, or you can right click on the folder and then choose "Rename."

To move files into the folder, simply drag them to it by clicking on the file in question and maneuvering it over the folder. And don't forget that you can use these same techniques to create a new folder within the folder. And within that folder. And down deeper and deeper it goes.

If you ever want to delete a folder, you can either drag it directly to the icon for your computer's Trash, or right click on the folder and select "Move to Trash" from the menu that appears.
How To Install Apps In Mac OS X

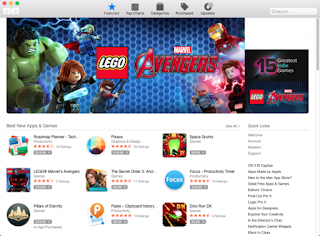
If you're fairly new to a Mac and want to be able to install applications, there are a couple of ways to do it. You can use the Mac App Store, which combines the download and installation into a single step. Or you can download programs from the web and then install them. Here's how to use both methods.
Install from the Mac App Store
Click on the price located beneath the app's star rating. If an app is free, the button will read Get.
Click on the green Install App button that appears. Enter your Apple ID password if prompted.
The app you just downloaded from the Mac App Store should automatically show up in Launchpad, ready for you to open with a single click.

Install from the Web
If you’ve downloaded a program straight from the Web, however, the installation process becomes slightly more complicated. If the file you've downloaded ends with the .zip extension, just double-click the file to unpack it.
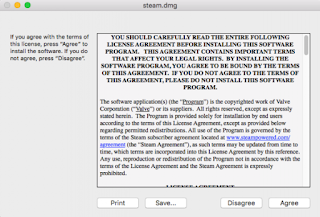
If the file you've downloaded is a disk image (these end with the .dmg extension), you’ll first have to "mount" the image onto your machine.
1. Click on the Finder icon at the bottom left of the screen.

2. Click Downloads on the left side of the window.
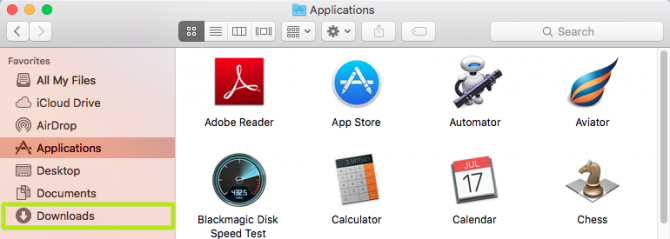
Double-click the downloaded file. If you get an error message that says the program "can't be opened because it wasn't downloaded from the Mac App Store," right-click the downloaded file and select Open.

4. Follow the on-screen instructions.
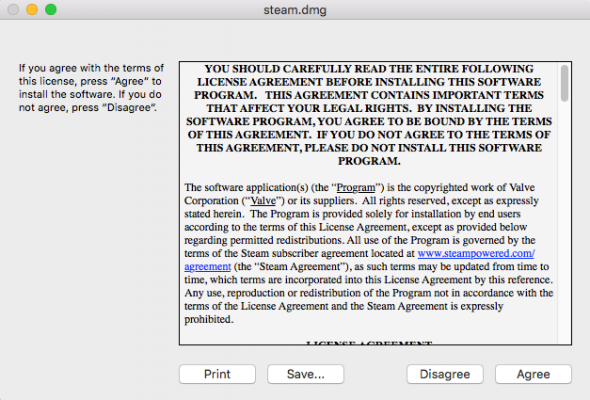
Once the file is mounted, it will appear as a device under Devices in the Finder. Once the application has been successfully installed, you can uninstall the .dmg file by clicking the eject button next to its name in the Finder.
5. Add the application to the Dock by dragging its icon from the Applications folder in the Finder to Dock. You can do the same thing from the Launchpad.
Shortcuts for Mac
Command + X: Cut selected text and copy it.
Command + C: Copy selected text.
Command + V: Paste copied text.
Command + Z: Undo previous command.
Command + A: Select all items.
Command + F: Open Find window to search text.
Command + H: Hide windows of the front app.
Command + N: Open a new document or window.
Command + O: Open a selected item.
Command + P: Print current document.
Command + S: Save current document.
Command + W: Close front window.
Command + Q: Quit the app.
Command + M: Minimize the front window to the Dock.
Command + Spacebar: Open Spotlight search field.
Command + Tab: Switch between open apps.
Command + B: Bold selected text.
Command + I: Italicize selected text.
Command + U: Underline selected text.
Command + Semicolon (;): Find misspelled words in document.
Option + Command + Esc: Choose an app to force quit.
Shift + Command + Tilde (~): Switch between open windows.
Shift + Command + 3: Take a screenshot.
Fn + Up Arrow: Scroll up one page.
Fn + Down Arrow: Scroll down one page.
Fn + Left Arrow: Scroll to beginning of document.
Fn + Right Arrow: Scroll to end of document.
Lesson 09
Force Creation Of A User Without A Home Folder

If the login.defs file has the option CREATE_HOME yes set then when a user is created a home folder will automatically be created.
To create a user without a home folder regardless of the settings use the following command:
useradd -M test
Specify The User's Full Name When Creating A User

As part of your user creation policy, you might choose to do something like the first initial, followed by the last name. For example, the username for John Smith will be jsmith.
When looking for details about a user you might not then be able to distinguish between John Smith and Jenny Smith.
Add a comment when you create an account so it is easier to find the user's real name.
Execute the following to add a comment:
useradd -m jsmith -c "john smith"
Analysing The /etc/passwd File

When you create a user the details of that user are added to the /etc/passwd file. To view the details about a particular user you can use the grep command as follows:
grep john /etc/passwd
The /etc/passwd file contains a colon-separated list of fields about each user.
The fields are as follows:
Username
Encrypted password (which you obviously can't see)
Userid
User's group id
Full name of the user
User's home directory
Login shell
What Is Root
root is the user name or account that by default has access to all commands and files on a Linux or other Unix-like operating system. It is also referred to as the root account, root user and the superuser.
The word root also has several additional, related meanings when used as part of other terms, and thus it can be a source of confusion to people new to Unix-like systems.
One of these is the root directory, which is the top level directory on a system. That is, it is the directory in which all other directories, including their subdirectories, and files reside. The root directory is designated by a forward slash ( / ).
Another is /root (pronounced slash root), which is the root user's home directory. A home directory is the primary repository of a user's files, including that user's configuration files, and it is usually the directory in which a user finds itself when it logs into a system. /root is a subdirectory of the root directory, as indicated by the forward slash that begins its name, and should not to be confused with that directory. Home directories for users other than root are by default created in the /home directory, which is another standard subdirectory of the root directory.
Root privileges are the powers that the root account has on the system. The root account is the most privileged on the system and has absolute power over it (i.e., complete access to all files and commands). Among root's powers are the ability to modify the system in any way desired and to grant and revoke access permissions (i.e., the ability to read, modify and execute specific files and directories) for other users, including any of those that are by default reserved for root.
A rootkit is a set of software tools secretly installed by an intruder into a computer that allows such intruder to use that computer for its own, usually nefarious, purposes when desired. Well designed rootkits are able to obtain root access (i.e., access to the root account rather than just to a user account) and to hide most or all traces of their presence and activities.
The use of the term root for the all-powerful administrative user may have arisen from the fact that root is the only account having write permissions (i.e., permission to modify files) in the root directory. The root directory, in turn, takes its name from the fact that the filesystems (i.e., the entire hierarchy of directories that is used to organize files) in Unix-like operating systems have been designed with a tree-like (although inverted) structure in which all directories branch off from a single directory that is analogous to the root of a tree.
The original UNIX operating system, on which Linux and other Unix-like systems are based, was designed from the very beginning as a multi-user system because personal computers did not yet exist and each user was connected to the mainframe computer (i.e., a large, centralized computer) via a dumb (i.e., very simple) terminal. Thus it was necessary to have a mechanism for separating and protecting the files of the individual users while allowing them to use the system simultaneously. It was also necessary to have a means for enabling a system administrator to perform such tasks as entering user directories and files to correct individual problems, granting and revoking powers for ordinary users, and accessing critical system files to repair or upgrade the system.
Every user account is automatically assigned an identification number, the UID (i.e., user ID), by a Unix-like system, and the system uses these numbers instead of the user names to identify and keep track of the users. Root always has a UID of zero. This can be verified by logging in as root (if using a home computer or other system that permits this operation) and running the echo command to display the UID of the current user, i.e.,
echo $UID
echo is used to repeat on the screen what is typed in after it. The dollar sign preceding UID tells echo to display its value rather than its name.
The UID for root (as well as for all other users) can also be seen by looking at /etc/passwd, which is the configuration file for user data. This file can be viewed (by default by all users) by using the cat command (which is commonly employed to read files), i.e.,
cat /etc/passwd | less
The output of cat /etc/passwd in this example is piped (i.e., transferred) to the less command to allow it to be read one screenful at a time, which is useful if the file is a long one. The line of output for root will look something like root:x:0:0:root:/root:/bin/bash. The first column shows the user name and the third column shows the UID, which can be seen to be zero.
The permissions system in Unix-like operating systems is set by default to prevent access by ordinary users to critical parts of the system and to files and directories belonging to other users. Thus, it can be very tempting for users new to such systems, especially those who are accustomed to systems with a weak permissions system or without any permissions system (e.g., Microsoft Windows or the older versions of the Macintosh), to bypass this permissions system on their personal computers by logging directly into the root account and staying there. Although this provides momentary relief, it should be avoided and ordinary work on the system should be done via an ordinary user account.
This is because it is very easy to damage a Unix-like system when using it as root -- much easier than to damage most other types of operating systems. The designers of most other operating systems devised methods of protecting the system and data to compensate for the lack of a robust permissions system.
However, an important principle of Unix-like operating systems is the provision of maximum flexibility to configure the system, and thus the root user is fully empowered. Unix-like systems assume that the system administrator knows exactly what he or she is doing and that only such individual(s) will be using the root account. Thus, there is virtually no safety net for the root user in the event of a careless error, such as damaging or deleting a critical system file (which could make the entire system inoperable).
Adding to the danger of routinely using the system as root is the fact that all processes (i.e., instances of programs in execution) started by the root user have root privileges. Because even the most widely used and well-tested application programs contain numerous programming errors (due to the huge amount of code required and its great complexity), a skilled attacker can often find and exploit such an error to obtain control of a system when a program is run with root privileges rather than using an ordinary user account, with its very limited privileges.
A critical means for preventing users from directly damaging Unix-like systems or increasing the vulnerability of such systems to damage by others is the avoidance of using the root account except when absolutely necessary, even by knowledgeable and experienced system administrators. That is, rather than routinely logging into the system as root, administrators should log in with their ordinary user accounts and then use commands, such as su, kdesu and sudo, that provide them with root privileges only as needed and without requiring a new login.
For example, to become root with su merely requires typing
su
at the command line (i.e., in the all-text mode), pressing the Enter key and supplying the root password. The account of the previous user can be returned to by pressing the Ctrl and d keys simultaneously or by typing the word exit and then pressing the Enter key.
The security associated with using su can be increased by using its -c option, which terminates it and causes an immediate return to the former user account after the current command has completed execution or after any program that it has launched has been closed.
Tasks that require root privileges include moving files or directories into or out of system directories (i.e., directories that are critical to the functioning of the operating system), copying files into system directories, granting or revoking user privileges, some system repairs, and the installation of some application programs. By default, it is not necessary to be root to be able to read most configuration files and documentation files in system directories, although it is necessary to be root to modify them.
Root privileges are usually required for installing software in RPM (Red Hat Package Manager) package format because of the need to write to system directories. If an application program is being compiled (i.e., converted into runnable form) from source code (i.e., its original, human-readable form), however, it can usually be configured to install and run from a user's home directory. Root privileges are not needed by an ordinary user to compile and install software in its home directory. Compiling software as root should be avoided for security reasons.
On large systems used by businesses and other organizations, there will likely be several system administrators. Each will have its own account in which it will ordinarily work (and the activities of which will be automatically recorded in system logs for security and repair purposes) but will also have access to the root account for use when necessary. The system administrator(s) might grant limited root privileges to some individuals, such as assistant administrators.
How Install Application Linux Terminal
If you have already downloaded any software in the package format, i.e. .deb File which is present on your local drive or Cd Drive then follow the below steps to install the package on your system.
Step 1: Open Terminal, Press Ctrl + Alt +T.
Step 2: Navigate to the directories were you have saved the .deb package on your system. For example, here we have saved in the download folder of home directories.
Use “cd” command to navigate to directories and use “ls” command to list directories content.
type cd home/username/download

Step 3: To install any software or making any modification on Linux require admin rights, which is here in Linux is SuperUser
type sudo su
Then type your Root password when prompted

Step 4: Here, we are installing Foxit Reader software package on the system, which is present in the download folder of home directories. Using “ls” command will list directory content.
type sudo dpkg –i filename.deb

Foxit Reader Installed Successfully…
Here,
sudo – we prefix most command with sudo because it’s a command which specifies super user permissions.
dpkg – dpkg is a tool to install, build, remove and to manage packages and –i specifies to install .deb file.
Installing a Software Package
Once you know the name of the package you want to install, type the below command to install that package. Here, VLC in the below command is the package name.
Type apt-get install VLC
It may ask “Do you want to Continue”, type Y to Install.

Lesson 08
What Is A Linux
Linux is a family of open source Unix-like operating systems based on the Linux kernel, an operating system kernel first released on September 17, 1991, by Linus Torvalds. Linux is typically packaged in a Linux distribution.
License: GPLv2 and others (the name "Linux" is a trademark)
Developer: Community; Linus Torvalds
Initial release date: September 17, 1991
OS family: Unix-like
Written in: C, Assembly language
Default user interfaces: Unix shell, KDE Plasma 5, MATE, Cinnamon, Unity, LXDE, elementary OS, Xfce


Linux is a family of open source Unix-like operating systems based on the Linux kernel, an operating system kernel first released on September 17, 1991, by Linus Torvalds. Linux is typically packaged in a Linux distribution.
License: GPLv2 and others (the name "Linux" is a trademark)
Developer: Community; Linus Torvalds
Initial release date: September 17, 1991
OS family: Unix-like
Written in: C, Assembly language
Default user interfaces: Unix shell, KDE Plasma 5, MATE, Cinnamon, Unity, LXDE, elementary OS, Xfce
What Is A Linux Terminal
The Linux console is a system console internal to the Linux kernel. The Linux console provides a way for the kernel and other processes to send text output to the user, and to receive text input from the user. The user typically enters text with a computer keyboard and reads the output text on a computer monitor.

How to Make a New Directory in Linux
Use the BASH (Bourne-Again SHell) command 'mkdir' to create a new directory in Linux for keeping your files and your hard drive organized. Each directory can have its own parameters attached, such as access, modification and removal permissions. "Mkdir" is one of the more important BASH commands used in Linux; you can use it to make a new directory whenever needed.
Step 1
Check the currently active directory before using the "mkdir" command. This will eliminate errors later if you are using a directory in which you don't have such command privileges. You can check this by using the "pwd" command and pressing "Enter."
Step 2
Type "mkdir [directory]" at the command prompt to make the directory. Use the name of your new directory in place of the [directory] command line operator. For example, to create a directory called "business," type "mkdir business." Be aware that this will create the directory within the current working directory.
Step 3
Use the "-p" command line parameter to create subdirectories within a parent directory. For example, type "mkdir -p games/strategy/chess" to create a directory tree including "strategy/chess" within the "games" directory.
Step 4
Create a new directory in a directory other than the current working directory using the "-p" command line parameter as you did to create a directory tree. In this situation always include the slash "/" before the first directory's name. In other words, if you wanted to create a "chess" directory in a "games" directory that already exists you would type "mkdir -p /games/chess."
Step 5
Make multiple directories at once using the "mkdir" command. Do this by including a space in between each of the directories you intend to create. For example, the command "mkdir -p games bin lib personal" would create "games," "bin," "lib" and "personal" directories all at once.
How To Create User Account

The following command will add a new user called test to your system:
sudo useradd test
What will happen when this command is run will depend on the contents of the configuration file located in /etc/default/useradd.
To view the contents of /etc/default/useradd run the following command:
sudo nano /etc/default/useradd
The configuration file will set a default shell which in Ubuntu is bin/sh. All the other options are commented out.
The commented-out options allow you to set a default home folder, a group, number of days after the password has expired before the account becomes disabled and a default expiry date.
The important thing to glean from the above information is that running the useradd command without any switches may produce different results on different distributions and it is all to do with the settings in the /etc/default/useradd file.
How To Create A User With A Home Directory

The previous example was fairly simple but the user may or may not have been assigned a home directory based on the settings file.
To force the creation of a home directory to use the following command:
useradd -m test
The above command creates a /home/test folder for the user test.
How To Create A User With A Different Home Directory

If you want the user to have a home folder in a different place to the default you can use the -d switch.
sudo useradd -m -d /test test
The above command will create a folder called test for user test under the root folder.
To get this to work without specifying a -m switch edit the file /etc/login.defs and at the bottom of the file add the following line:
CREATE_HOME yes
How To Change A User's Password Using Linux

Now that you have created a user with a home folder you will need to change the user's password.
To set a user's password use the following command:
passwd test
The passwd command will allow you to set the test-user's password. You will be prompted for the password you wish to use.
How To Switch Users

You can test your new user's account by typing the following into a terminal window:
su - test
The above command switches user to the test account and assuming you created a home folder you will be placed in the home folder for that user.
Create A User With An Expiry Date

If you are working in an office and you have a new contractor starting who is going to be at your office for a short period of time then you will want to set an expiry date on his or her user account.
Similarly, if you have family coming to stay then you can create a user account for that family member that expires after he or she has departed.
To set an expiry date when creating a user, use the following command:
useradd -d /home/test -e 2016-02-05 test
The date must be specified in the format YYYY-MM-DD where YYYY is the year, MM is the month number and DD is the day number.
How To Create A User And Assign It To A Group

If you have a new user joining your company then you might want to assign specific groups for that user so that they have access to the same files and folders as other members of their team.
For example, imagine you had a guy called John and he was joining as an accountant.
The following command would add john to the accounts group.
useradd -m john -G accounts
Adjusting Login Defaults Within Linux

The file /etc/login.defs is a configuration file that provides the default behavior for login activities.
There are some key settings in this file. To open the /etc/login.defs file enter the following command:
sudo nano /etc/login.defs
The login.defs file contains the following settings which you might want to change:
PASS_MAX_DAYS: How long before a password expires.
PASS_MIN_DAYS: How often can a password be changed.
PASS_WARN_AGE: Number of days warning before a password expires.
LOGIN_RETRIES: Number of login attempts before failure.
LOGIN_TIMEOUT: How long is it before the login times out.
DEFAULT_HOME: Can a user login if no home folder exists.
How To Specify Login Password Expiry When Creating A User

You can set a password expiry date, the number of login retries, and the timeout when creating a user.
The following example shows how to create a user with a password warning, a maximum number of days before the password expires, and login-retries set.
sudo useradd test5 -m -K PASS_MAX_DAYS=5 -K PASS_WARN_AGE=3 -K LOGIN_RETRIES=1
Lesson 07
How To Install Software In Windows PC
our computer allows you to do some really amazing things. Digital photo editing, sophisticated computer gaming, video streaming—all of these things are possible because of different types of software. Developers are always creating new software applications, which allow you to do even more with your computer.
Installing from a CD-ROM
From the mid-1990s through the late 2000s, the most common way to get new software was to purchase a CD-ROM. You could then insert the disc, and the computer would walk you through through the installation.
Now, almost all software has moved away from this model. Many new computers no longer include a CD-ROM for this reason. However, if you do need to install software from a CD-ROM, simply insert the disc into your computer, then follow the instructions.
Installing software from the Web
Today, the most common way to get new software is to download it from the Internet. Applications like Microsoft Office and Adobe Photoshop can now be purchased and downloaded right to your computer. You can also install free software this way. For example, if you wanted to install the Google Chrome web browser, you can visit this page and click the Download button.
The installation file will be saved to your computer in .exe format. Pronounced dot e-x-e, this is the standard extension for installation files on Windows computers. You can follow the steps below to install an application from an .exe file.
Locate and download an .exe file


What Is A Hardware Driver
In computing, a device driver is a computer program that operates or controls a particular type of device that is attached to a computer. A driver provides a software interface to hardware devices, enabling operating systems and other computer programs to access hardware functions without needing to know precise details about the hardware being used.
A driver communicates with the device through the computer bus or communications subsystem to which the hardware connects. When a calling program invokes a routine in the driver, the driver issues commands to the device. Once the device sends data back to the driver, the driver may invoke routines in the original calling program. Drivers are hardware dependent and operating-system-specific. They usually provide the interrupt handling required for any necessary asynchronous time-dependent hardware interface.
Hardware Driver Finder Tools

What Is A Computer Virus
A computer virus is malicious code that replicates by copying itself to another program, computer boot sector or document and changes how a computer works. The virus requires someone to knowingly or unknowingly spread the infection without the knowledge or permission of a user or system administrator. In contrast, a computer worm is stand-alone programming that does not need to copy itself to a host program or require human interaction to spread. Viruses and worms may also be referred to as malware.
A virus can be spread by opening an email attachment, clicking on an executable file, visiting an infected website or viewing an infected website advertisement. It can also be spread through infected removable storage devices, such USB drives. Once a virus has infected the host, it can infect other system software or resources, modify or disable core functions or applications, as well as copy, delete or encrypt data. Some viruses begin replicating as soon as they infect the host, while other viruses will lie dormant until a specific trigger causes malicious code to be executed by the device or system.
Many viruses also include evasion or obfuscation capabilities that are designed to bypass modern antivirus and antimalware software and other security defenses. The rise of polymorphic malware development, which can dynamically change its code as it spreads, has also made viruses more difficult to detect and identify.

Antivirus software is a class of program designed to prevent, detect and remove malware infections on individual...


our computer allows you to do some really amazing things. Digital photo editing, sophisticated computer gaming, video streaming—all of these things are possible because of different types of software. Developers are always creating new software applications, which allow you to do even more with your computer.
Installing from a CD-ROM
From the mid-1990s through the late 2000s, the most common way to get new software was to purchase a CD-ROM. You could then insert the disc, and the computer would walk you through through the installation.
Now, almost all software has moved away from this model. Many new computers no longer include a CD-ROM for this reason. However, if you do need to install software from a CD-ROM, simply insert the disc into your computer, then follow the instructions.
Installing software from the Web
Today, the most common way to get new software is to download it from the Internet. Applications like Microsoft Office and Adobe Photoshop can now be purchased and downloaded right to your computer. You can also install free software this way. For example, if you wanted to install the Google Chrome web browser, you can visit this page and click the Download button.
The installation file will be saved to your computer in .exe format. Pronounced dot e-x-e, this is the standard extension for installation files on Windows computers. You can follow the steps below to install an application from an .exe file.
Locate and download an .exe file

Locate and double-click the .exe file. (It will usually be in your Downloads folder.)

A dialog box will appear. Follow the instructions to install the software.

The software will be installed. You can now open the application from the Start menu (Windows 7) or the Start Screen (Windows 8).

What Is A Hardware Driver
In computing, a device driver is a computer program that operates or controls a particular type of device that is attached to a computer. A driver provides a software interface to hardware devices, enabling operating systems and other computer programs to access hardware functions without needing to know precise details about the hardware being used.
A driver communicates with the device through the computer bus or communications subsystem to which the hardware connects. When a calling program invokes a routine in the driver, the driver issues commands to the device. Once the device sends data back to the driver, the driver may invoke routines in the original calling program. Drivers are hardware dependent and operating-system-specific. They usually provide the interrupt handling required for any necessary asynchronous time-dependent hardware interface.
Hardware Driver Finder Tools

What Is A Computer Virus
A computer virus is malicious code that replicates by copying itself to another program, computer boot sector or document and changes how a computer works. The virus requires someone to knowingly or unknowingly spread the infection without the knowledge or permission of a user or system administrator. In contrast, a computer worm is stand-alone programming that does not need to copy itself to a host program or require human interaction to spread. Viruses and worms may also be referred to as malware.
A virus can be spread by opening an email attachment, clicking on an executable file, visiting an infected website or viewing an infected website advertisement. It can also be spread through infected removable storage devices, such USB drives. Once a virus has infected the host, it can infect other system software or resources, modify or disable core functions or applications, as well as copy, delete or encrypt data. Some viruses begin replicating as soon as they infect the host, while other viruses will lie dormant until a specific trigger causes malicious code to be executed by the device or system.
Many viruses also include evasion or obfuscation capabilities that are designed to bypass modern antivirus and antimalware software and other security defenses. The rise of polymorphic malware development, which can dynamically change its code as it spreads, has also made viruses more difficult to detect and identify.

What Is A Anti Virus Guard
Antivirus software is a class of program designed to prevent, detect and remove malware infections on individual...
Windows Shortcut Keys
Windows Key + R: Opens the Run menu.
Windows Key + E: Opens Explorer.
Alt + Tab: Switch between open programs.
Windows Key + Up Arrow: Maximize current window.
Ctrl + Shift + Esc: Open Task Manager.
Windows Key + Break: Opens system properties.
Windows Key + F: Opens search for files and folders.
Windows Key + D: Hide/display the desktop.
Alt + Esc: Switch between programs in order they were opened.
Alt + Letter: Select menu item by underlined letter.
Ctrl + Esc: Open Start menu.
Ctrl + F4: Close active document (does not work with some applications).
Alt + F4: Quit active application or close current window.
Alt + Spacebar: Open menu for active program.
Ctrl + Left or Right Arrow: Move cursor forward or back one word.
Ctrl + Up or Down Arrow: Move cursor forward or back one paragraph.
F1: Open Help menu for active application.
Windows Key + M: Minimize all windows.
Shift + Windows Key + M: Restore windows that were minimized with previous keystroke.
Windows + F1: Open Windows Help and Support.
Windows + Tab: Open Task view.
Windows + Break: Open the System Properties dialog box.
Hold Right SHIFT key for eight seconds: Switch FilterKeys on and off.
Left Alt + Left Shift + Print Screen: Switch High Contrast on and off.
Left Alt + Left Shift + Num Lock: Switch Mouse keys on and off.
Press Shift five times: Switch Sticky keys on and off.
Hold Num Lock for five seconds: Switch Toggle keys on and off.
How To Begin Touch Typing

Typing Lessons
Take typing speed test, practice your touch typing skills, learn to type faster and with fewer errors with this free online typing tutor.
What Is Touch Typing?
Touch typing is the ability to use muscle memory to find keys fast, without using the sense of sight, and with all the available fingers, just like piano players do. It significantly improves typing speed and eliminates errors. Touch typing simply makes you more productive and it is a skill worth learning. However, many people engage in the bad habit of ‘hunt-and-peck’ typing, even those seasoned professionals with years and decades of computer experience. It is easy to understand, though, as touch typing requires dedicated practice to learn it well.
Lesson 06
How To Create New Folder

Go to the area where you want to create the folder. The easiest example is your computer's desktop, but you can create a folder anywhere on your computer.

sure you don't right-click on a file or folder instead, as this will open the wrong drop-down menu.
If you're in an existing folder (e.g., Documents), you can also click the Home tab on the top-left side of the File Explorer window and click New Folder in the toolbar that appears.


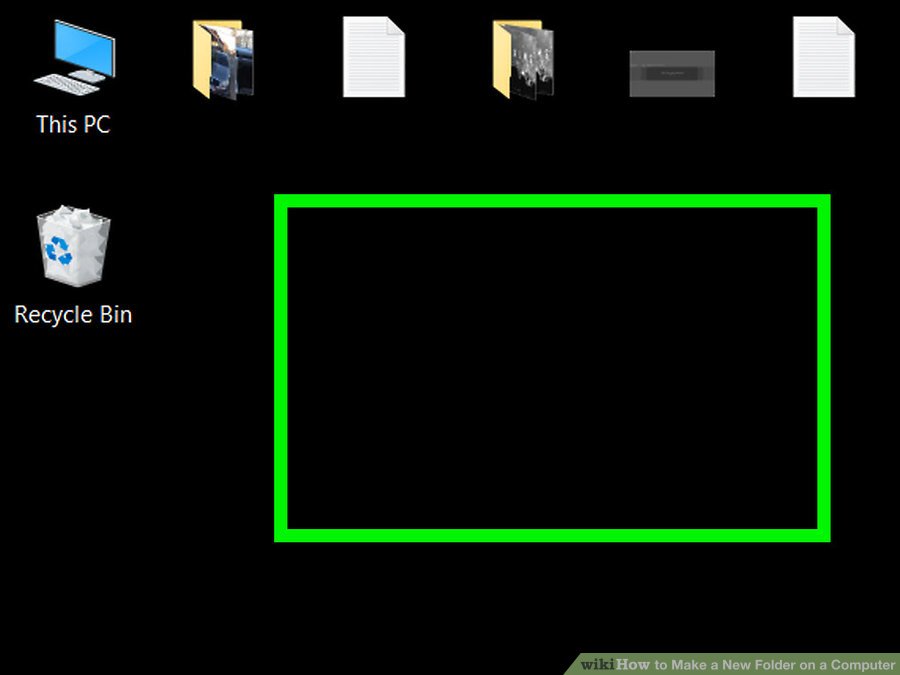
Go to the area where you want to create the folder. The easiest example is your computer's desktop, but you can create a folder anywhere on your computer.
- You can open File Explorer by clicking the Start menu Image titled and type in "file explorer", and then click Image titled File Explorer at the top of the Start menu. From there, you can select any folder to open from the left-hand pane.
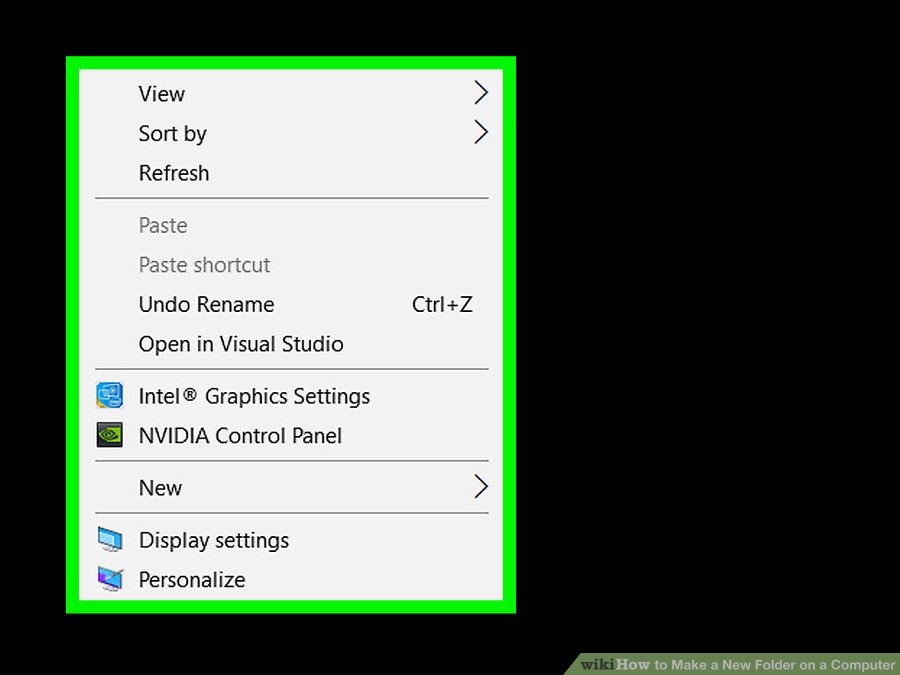
sure you don't right-click on a file or folder instead, as this will open the wrong drop-down menu.
If you're in an existing folder (e.g., Documents), you can also click the Home tab on the top-left side of the File Explorer window and click New Folder in the toolbar that appears.
- If you're on a computer with a trackpad instead of a mouse, click the trackpad with two fingers to perform a right-click.
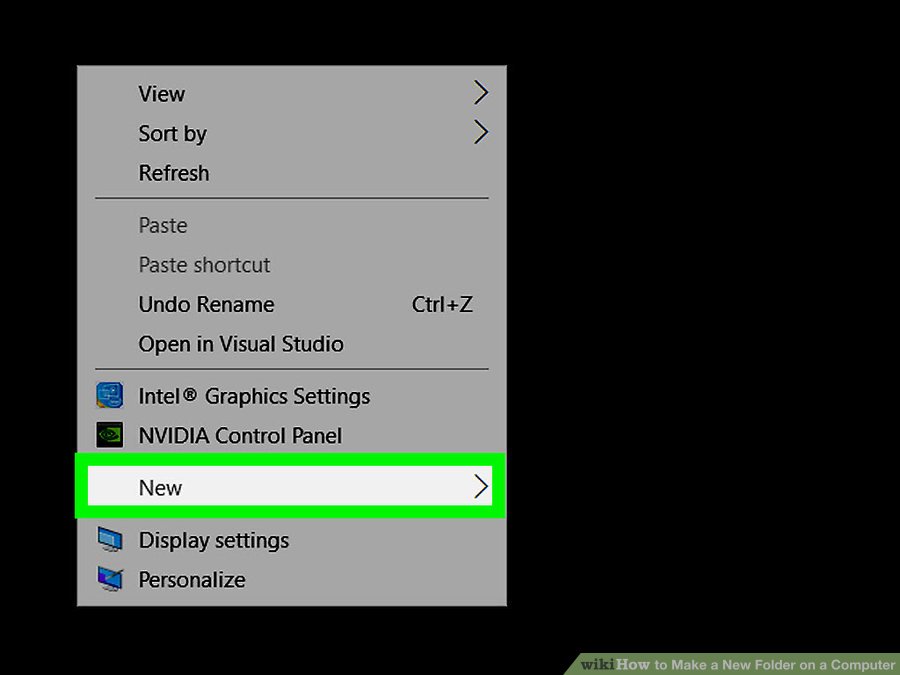
Select New. This option is near the bottom of the drop-down menu and opens another pop-out menu.

Click Folder. It's at the top of the pop-out menu.

Type in a name for your folder and press ↵ Enter. This creates the folder with its new name.
The folder's name cannot contain any special punctuation or other characters.
If you don't type in a name, your folder will be saved as "New Folder".
Folder Structure


How To Create User Account
Choose Start→Control Panel and in the resulting window, click the Add or Remove User Accounts link.
The Manage Accounts dialog box appears.

Click Create a New Account.
The Create New Account dialog box appears.

Enter an account name and then select the type of account you want to create.
An Administrator can do things like create and change accounts and install programs. A Standard user can’t do the tasks an administrator can.
Click the Create Account button and then close the Control Panel.
After you create an account, you can make changes to it, such as assigning a password or changing the account type, by double-clicking it in the Manage Accounts dialog box.
Subscribe to:
Posts (Atom)